
Adding Transparent Smoke, Fire, and Neon Effects Directly in CapCut & Premiere Pro
 By Pics PNG
•
Jun 14, 2026
By Pics PNG
•
Jun 14, 2026
Stop Keying: Why Alpha-Channel Overlays Beat Green Screens
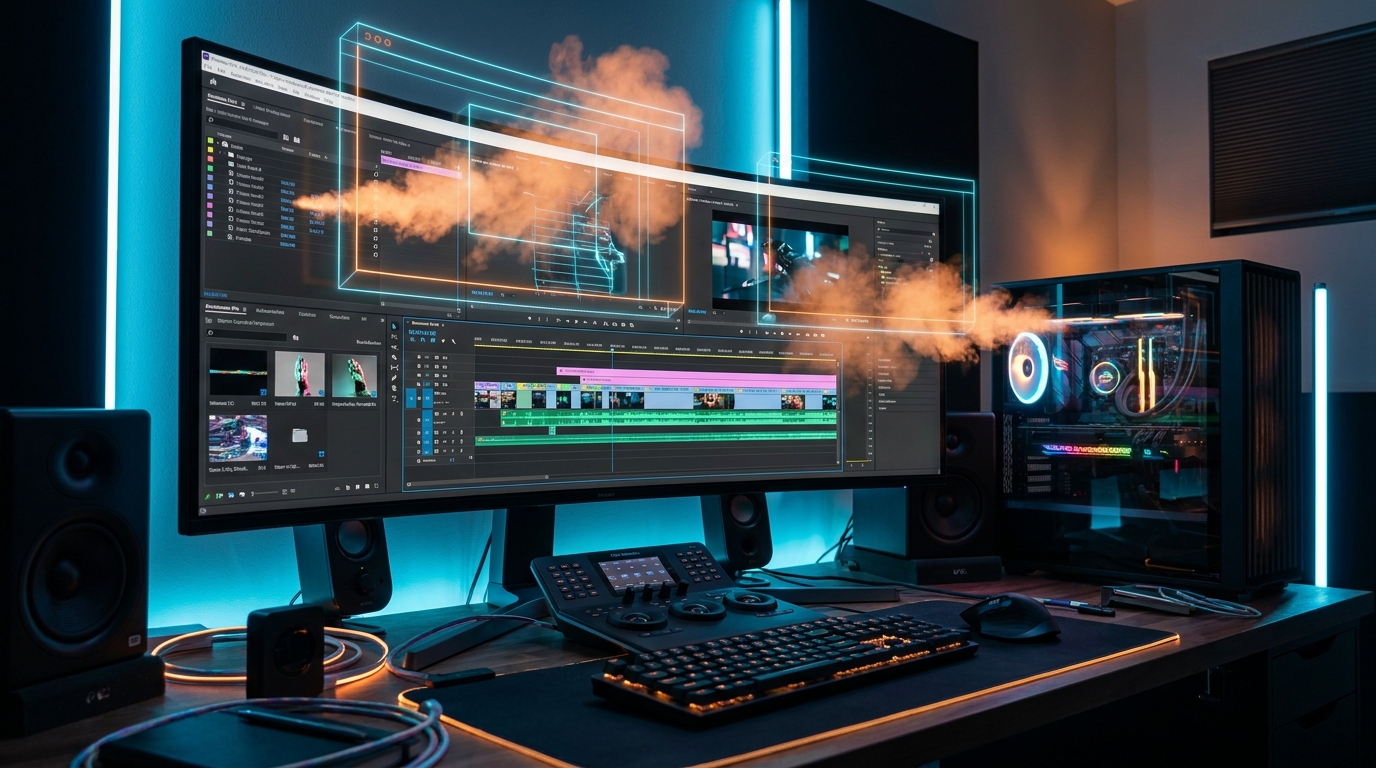
For video editors, adding atmospheric elements like smoke, fire explosions, or neon glow boxes usually means downloading a green-screen video asset and using a chroma-key filter to remove the color. However, chroma-keying often leaves ugly colored fringes, eats up rendering CPU power, and ruins the natural transparency of smoke or light glows.
The secret to fast, professional video overlays is using static transparent WebP or PNG graphics that contain native alpha channels. When you import these graphics into your video editing software, the background is already 100% transparent. No keying filters are required, and the edges merge perfectly with your underlying video tracks.
How to Import and Overlay Elements in CapCut
CapCut is exceptionally fast for social media edits, and it handles transparent graphic formats perfectly. Here is how to add them:
- Download your desired visual effect (such as a transparent fire overlay or neon frame) from PicsPNG.
- Open your CapCut project and import the graphic into your media library.
- Drag the graphic onto the track directly above your main video track.
- Adjust the duration of the overlay by dragging its edges. Go to the Video -> Basic panel on the right and adjust the scale, position, or opacity to fit your shot.
Advanced Techniques in Adobe Premiere Pro
If you are using Adobe Premiere Pro for cinematic video editing, transparent graphics open up advanced layout opportunities:
- Blend Modes: For light overlays like neon glows or lens flares, place the asset on Video Track 2, navigate to the Effect Controls tab, and change the Blend Mode from "Normal" to "Screen" or "Linear Dodge (Add)". This merges the lighting effect with your video pixels naturally. For more details, see the Adobe Premiere Pro Blend Modes guide.
- Keyframe Animations: You can animate static transparent effects easily. Go to Effect Controls, toggle the stopwatch next to "Scale" and "Position", and create keyframes to simulate a smoke cloud drifting or a neon frame pulsing.
- Nesting for Complexity: Nest your graphic tracks together to apply color corrections (like Lumetri Color) to multiple transparent overlays simultaneously without affecting the background video.
Top PicsPNG Collections for Editors
Explore the full PNG Directory to find smoke and neon graphics. Highlights include:
- Atmospheric Smoke: Meticulously blended gray and white smoke cutouts, ideal for transition overlays.
- Dynamic Fire: Flames and sparks with no black backgrounds, ready to place on dark sequences.
- Cyberpunk Neon: Glowing frames, arrows, and borders to highlight social call-to-actions.
Suggested Articles
Boost your design skills with our related guides and resources.

Learn why large uncompressed PNG files slow down your Canva canvas and how to import modern transparent WebPs to speed up your digital layouts.

Large transparent PNG files damage your PageSpeed LCP score. Learn how serving modern WebPs with alpha channels preserves transparency while cutting file sizes by 30%.
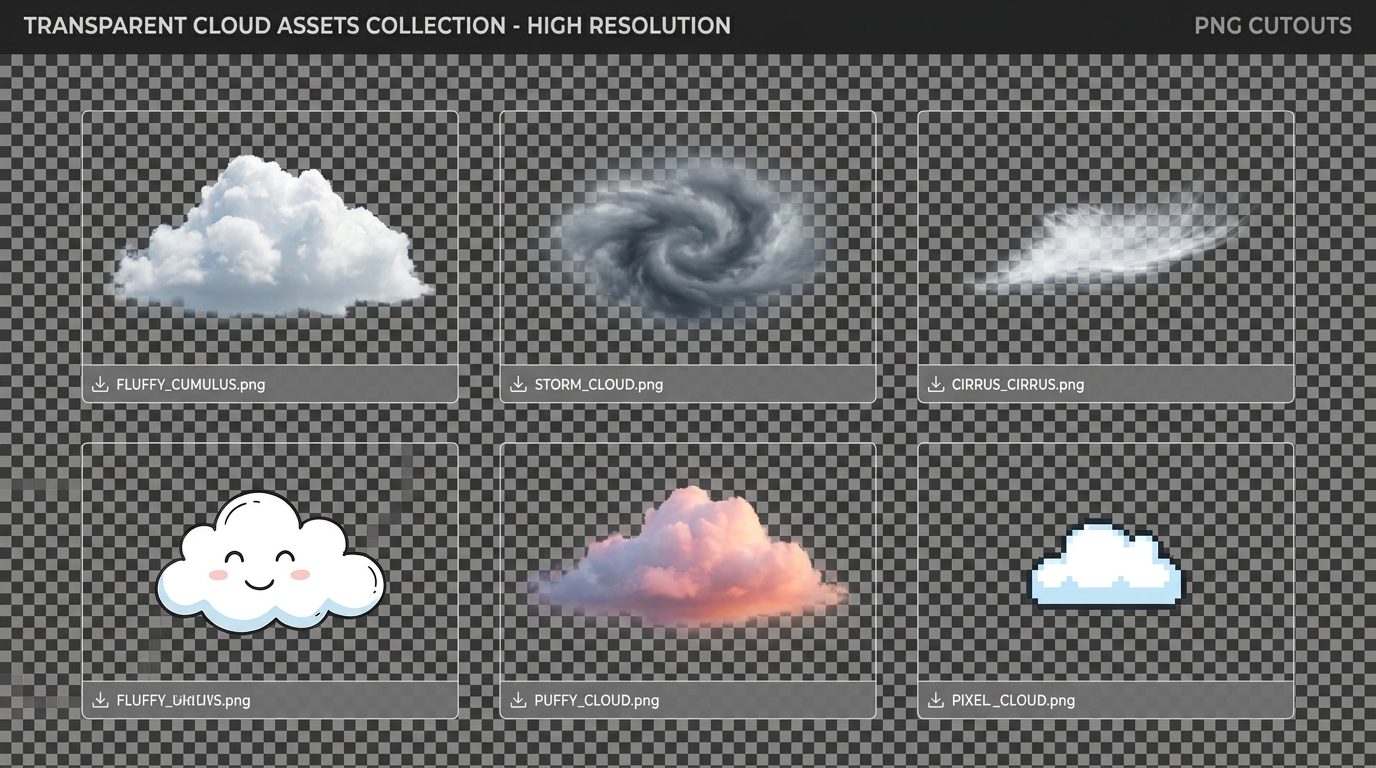
Discover how to use transparent cloud PNG overlays to replace skies, build digital art composites, and design creative graphic layouts.
Comments (0)
You must be logged in to leave a comment.
Sign In