
Creative Ways to Use Blood Splatter PNG: Horror Effects and Graphic Design Tips
 By Pics PNG
•
Jun 13, 2026
By Pics PNG
•
Jun 13, 2026
When designing assets for horror video games, Halloween event posters, gothic book covers, or dramatic cinema trailers, realism is key. Creating organic fluid dynamics from scratch is time-consuming. This is why professional designers rely on high-quality blood splatter png cutouts.
Having a transparent, pre-cut file allows you to quickly overlay realistic blood drips, sprays, and splats onto any backdrop without dealing with background masks. In this tutorial, we will discuss creative ways to incorporate these textures into your graphic designs and video timelines, along with practical tips to make the effects blend seamlessly.
Understanding the Aesthetic of Horror Overlays
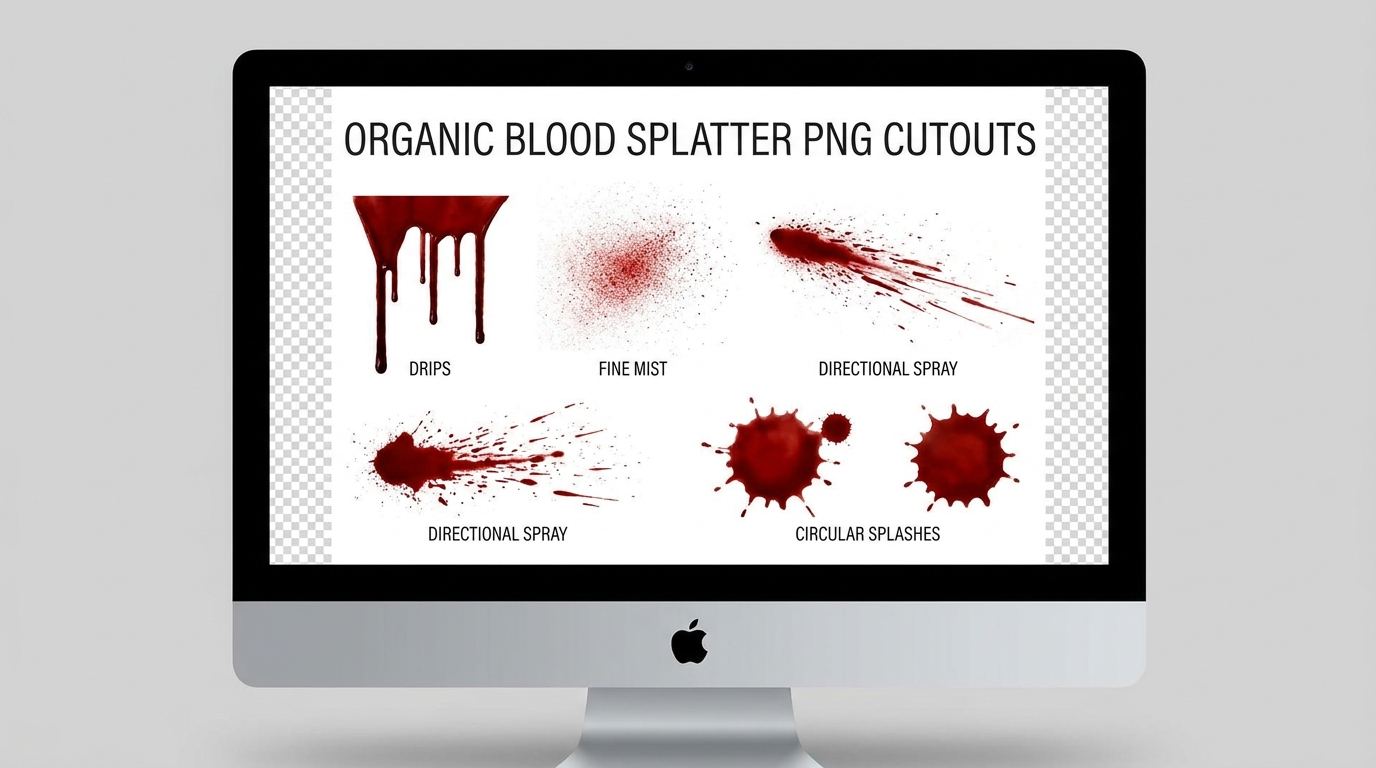
Blood overlays are not just for gore; they are visual storytelling elements. A fine mist indicates high-velocity action, whereas a slow drip conveys suspense and dread. By choosing the right shape of blood splatter transparent png, you reinforce the mood of your project.
| Splatter Type | Visual Style | Psychological Impact | Best Niche Use Case |
|---|---|---|---|
| Fine Spray / Mist | High-velocity droplets | Shock, sudden action | Combat game UI, action poster headers |
| Drips & Runs | Gravitational vertical flow | Suspense, slow horror | Gothic book covers, spooky invitations |
| Circular Splat | Flat impact shape | Sudden violence, impact | Crime scene vector graphics, poster art |
| Handprints | Smudged contact outline | Panic, escape attempt | Escape room brochures, horror movie posters |
Step-by-Step: Blending Blood Splatter PNGs in Photoshop
Simply placing a red graphic over a photo is not enough to look realistic. Follow this quick workflow to achieve photo-realistic integration:
Step 1: Place the Graphic Layer
Import your chosen splatter png horror file into your design software (such as Photoshop, Canva, or GIMP) as a layer above your target object (e.g., a brick wall, text, or a character's face). You can grab high-quality horror overlays from our Effects & Overlays category.
Step 2: Match the Blending Mode
By default, the overlay might look flat and sit on top of textures. In Photoshop, change the Layer Blending Mode.
- For dark backdrops, try Multiply or Linear Burn.
- If placing blood on metallic surfaces, Color Burn or Overlay works best to adapt to underlying highlights.
Step 3: Match the Luminosity
Real dried blood turns dark brown or maroon rather than bright red. Use a Hue/Saturation adjustment layer clipped to your splatter layer. Drop the saturation slightly (around -15%) and decrease the lightness to darken the shade, matching the lighting environment of the scene.
Step 4: Add Texture Depth (Advanced)
Double-click the blood layer to open Layer Styles. Under the "Blend If" sliders, drag the Underlying Layer sliders to allow the rough texture of the wall or background to push through the blood. Apply a subtle Bevel and Emboss to give the edges a slight 3D thickness, simulating liquid volume.
Creative Applications for Graphic Designers
Beyond traditional horror themes, you can use these assets in unique design projects:
- Text distortion: Make typography look as if it is dripping by placing small drips along the letters.
- Grungy borders: Frame a design using a mixture of dirt, ink, and blood spray brushes.
- Halloween invitations: A subtle handprint on a clean invite immediately sets a thrilling tone.
If you are a mobile video creator, you can follow a similar path. Load the file as an overlay inside CapCut or Alight Motion, and use the Opacity & Blending features to integrate the texture over a video background. Check out our App Assets for other mobile-friendly graphics.
Key Misconceptions About Designing with Liquid Overlays
The biggest mistake is ignoring color matching. Fresh liquid is brighter, while older splatters dry out into dark, flat brown-black colors. Additionally, liquid overlays must obey gravity. If your canvas shows a vertical wall, ensure your drips run downwards, not sideways!
Frequently Asked Questions
Can I download these blood splatters for free on PicsPNG?
Yes! Our entire collection of transparent effects, overlays, and graphics is free to download for personal and design use.
Are these images pre-cut with transparency?
Yes. All assets are delivered as high-quality PNGs with true transparency, saving you the hassle of using magic wands or background erasers.
How do I make the blood look wet in my edit?
Add a glossy highlight. In Photoshop, this is done by adding a inner bevel highlight or using a soft white brush to draw light reflections on the curves of the drips.
Do you offer vector formats?
Our files are high-density raster PNGs. For flat graphic designs, these offer the organic texture detail required for realistic liquid effects.
Conclusion
Incorporating a detailed blood splatter png into your canvas adds depth, drama, and instant atmosphere to creative designs. By using blending modes, grain matching, and color correction, your designs will look incredibly realistic. Visit our Effects & Overlays Category to explore all available graphic resources.
Suggested Articles
Boost your design skills with our related guides and resources.

Learn why large uncompressed PNG files slow down your Canva canvas and how to import modern transparent WebPs to speed up your digital layouts.
Ditch the green screens. Learn how to import lossless transparent WebP/PNG design overlays directly into CapCut and Premiere Pro timelines with clean anti-aliasing edges.

Large transparent PNG files damage your PageSpeed LCP score. Learn how serving modern WebPs with alpha channels preserves transparency while cutting file sizes by 30%.
Comments (1)
You must be logged in to leave a comment.
Sign In
Incorporating a detailed blood splatter png into your canvas adds depth, drama, and instant atmosphere to creative designs. By using blending modes, grain matching, and color correction, your designs will look incredibly realistic. Visit our Effects & Overlays Category to explore all available graphic resources.